There is nothing more satisfying about using your own computer than being used to our old trusty mouse and having it work and point right at where you want, glide over the screen just as intended and click over any icon or enemy you wish to obliterate, you almost forget about the mouse in your hand and just become one with your computer....

a deadmaus :D
But then one day as you click away in your domain, something goes wrong, the enemies are not dying and your favorite folders or site do not open.. its inevitable, mouse click buttons are mechanical parts and they will stop functioning one day when you least expect it...
Now if your mouse is a normal cheap generic brand one, you can just simply go out and buy another one... but this is hardly the case, we grow to love and need our own mouse, the way it feels in our hands, its weight its momentum, everything about it becomes a part of us, and anyone that has ever needed to use someone else`s mouse will know the feeling...
Gaming Mice - Microsoft - Razer, Cyborg , logitech and many more!
It even becomes a worse problem for the gaming community as each person has built their skills and reputation around their own mouse, some people build a career out of gaming and E-sports, using costly 125$ dollar mice, such as the Cyborg RAT9 toted as the most expensive and best mouse for gaming, some folks prefer the Razor Deathadder or the Microsoft Habu to name a few, even microsoft in the past was renowned for having the best affordable optical gaming mouse, with the InteliMouse Explorer 3.0 which was discontinued a few years ago and people up to this day hunt it down and or sell for a big bucks!


Cyborg Rat7, Logitech Mx , Microsoft Habu and Razer Deathadder
look at these beauties.. and all cost a hefty buck ;O
People with big wallets can just go and buy another one, or "upgrade" into a better model, but in such cases it can take a while to get used to the new shape, even moving from an optical mouse to a laser one, adds a whole new list of problems as the sensitivity becomes increased and the DPI change from 800dpi to 1200 or even 3000, making you re learn your mouse habits....
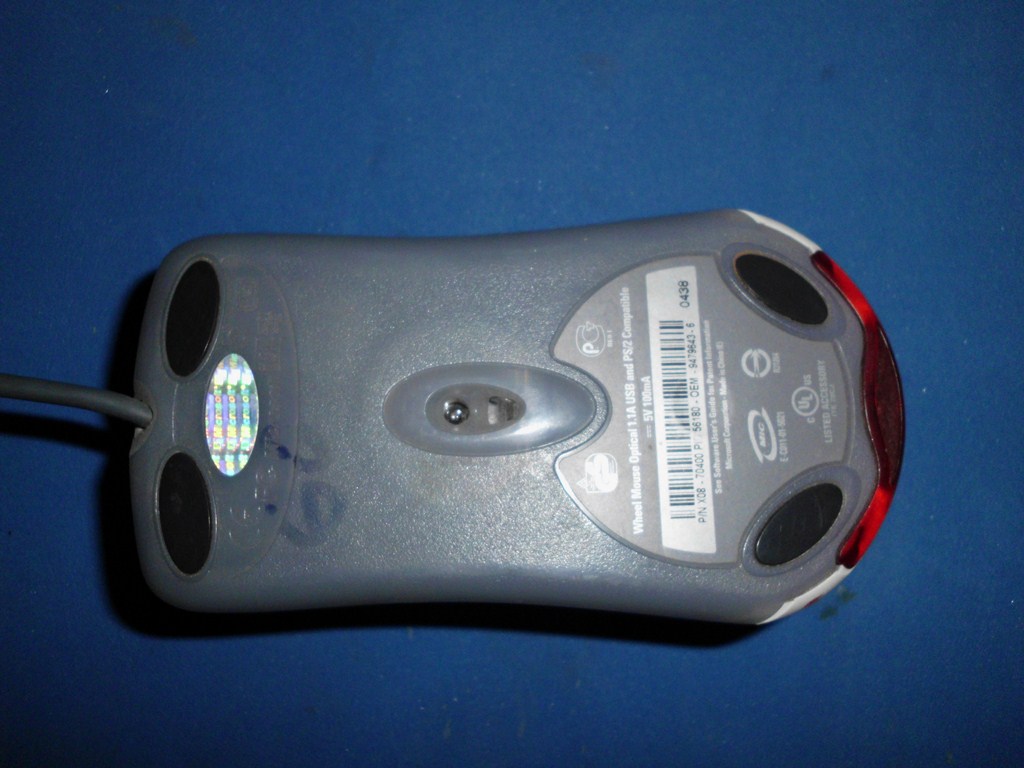
At work we love the Microsoft Wheel Mouse Optical, with a dpi of 800 and with a modifiable polling rate of 125mhz-100mhz this is the choice of gamers around the world, with a price of around 10$ these became the craze years ago, now tough they can go as high as 25$ dollars so i wanted to see if i could fix them...
How to revive your dead clicks - Lets perform surgery!
So how do you overcome the issue and give it a try at saving your mouse?... well go out and buy a mouse... literally!... a cheap generic mouse will have somewhere around 2 to 5 click buttons which are most likely to be compatible with yours! and instead if having to re buy your own 30-50$ mouse, you might just save it with a 5$ one!.. of course you will need a few tools and the desire to adventure into soldering territory, but if you crave for adventure then follow my lead :D!You will need some tools for this job and just like in my mother board capacitor repair guide, here is a list of what you will need.
Small Star/flat screwdriver to open up your mouse!
Soldering Iron - to heat and remove/solder the mouse click buttons!
Flux soldering paste - to make solder flow into the copper wire with ease!
Copper Solder Wire - to remove solder material from the mouse click buttons
Solder wire - to solder the new click buttons in place
Your loved trusty mouse - of course
A cheap generic mouse - from where you will harvest its click organs :O
Opening up your mice - getting your hands dirty!
First of all we need to open up our mice and see if the click buttons will be compatible, there is not much science to opening up a mouse other than removing the little rubber pads at the bottom and looking for screws to remove, some casings are held by pressure or latches so be sure to apply proper pressure and or leverage to release any stubborn mouse open, here you will see the Wheel Mouse Optical has two plastic latches on the top that need to be pushed inside, a normal sized flat screw driver does the job as you pull the cover open.. you just need to learn the trick...


take off the plastic pads, unscrew any screws..and push any latches to pry the sucker open :D
We can now gaze into the mouse Innards we see the click buttons and the optical interface, we have to remove any more screws we find, and remove the scroll wheel part as well, in this mouse you just pull it up from the right side and it pops free, but take care to notice how its lodged in its place in other mice, because you could easily break it if you just yank it off, on my cheap mouse i had to remove the circuit board to slide the scroll wheel to a side.


Keep removing screws and retrieving the circuity parts until you are left with it alone and can easily access the click buttons on either mice, compare them and check that the button's legs have the same separation.. you can see that Microsofts mice have single squared 2 leg click button, while the replacement parts have 3 legs, we just have to get rid of the extra leg as it is not needed, try to bend it off or break it away, but do not pull from it, as doing so will move the parts inside the button and render it useless, rectangular mouse click buttons are newer and chances are your mouse uses these already. PROTIP: its best to find the correct mouse button replacement part at your local radio shack or electronics shop!


careful with that third leg, it might short against the board even if cut, so file it down,
or use electrical tape to insulate it from touching the Board!
Heat up your soldering iron and drench your copper wire in flux paste, now take the wire and press it flat against where the buttons are soldered to the circuit board, press the solder iron tip on top of it and move it around, you will see the material melt and flow into the copper wire, leaving the solder point clean and smooth, repeat for all the contact points until the button falls free and or can easily be pulled off.


If your middle click button is working fine you can leave it as it is, most times this button is strictly square shaped and makes it hard to use a newer rectangular one, my advice is to save any good mouse click button that you swap out and save it as a spare for such purpose.. you can see that i really have no room in there for a rectangular one in mine..


Slide the new button in place and hold it firmly down to the circuit board, while applying the tip of your solder iron to the prodding legs, if you do not press it down flat to the board you will run into trouble as the click force will rest on the soldering point and eventually break over time, you want the click force to rest on the plastic housing and onto the circuit board..
Remember to insulate that third leg! or file it off so it doesnt touch the board!
Once the buttons are in place, go and plug your mouse into your computer and test the click buttons, they should work fine, but if not, check that they are properly soldered to the circuit board
PROTIP:You have to be careful when removing the old buttons and sliding in the new ones, there is a metal ring on the board hole that is connected to the circuitry lines, if you dont remove the solder properly and or stab the mouse buttons in place with too much force, you could break this ring off from the board and render the contact useless in such case you will have to follow the trace line board and make a physical cable connection from the buttons leg, all the way to where the board makes a jump to the optical board part.. it sounds tricky and hard, but you just have to solder a wire from the button to where the board line goes to...
IF everything works well, its time to put everything back together, screw the boards in place, carefully align any parts in place and slide in the mouse wheel in place, you can also take the opportunity to clean the wheel and the plastic casings.. its full of skin cells and sweat... yuk xD
PROTIP: Lots of mice have a problem where the usb cable breaks off internally at the point where it comes out from the mouse, due to the use and movement of the cable, if your mouse has not failed form this yet, you can place the cable in such way that the internal cable bends are done with "new" cable, keeping the formerly bent parts inside the mouse,, you will loose and inch of cable but well worth to avoid such problem, if the mouse is failing due to this, you just need to snip off the "bent" cable parts close to the board and shorten the cable re soldering and insulating the 4 usb cables , color to color.
And there you go, its a bit of a tricky process and i am still learning as i go, but this has been my answer to revive a dead 50$ mouse with the correct or similar buttons i am ot of luck since one here sells mice buttons, but at leas ti can get 4 buttons for 4$ so its a bargain to keep trying till it works!
I hope this guide has helped you venture into the world of do it yourself fixes,thanks for your visit, over and out :D
THIS IS THE BEST DEADMAU5
Very good data! Very useful truth.! I'm following the next entries.!!
ReplyDeleteI relive my childhood to moment view the video! XD
ReplyDeleteI own a Cyborg R.A.T mouse and it is possibly the best mouse i have every bought. After having Razer mice, and Logitech for most of my life. Best Mouse ive ever bought!
ReplyDeleteOscar Buenas Tardes ocupo saber si tiene mouse veragon
ReplyDeleteMe puede aceptar en fb
ReplyDelete